
There are a lot of tutorials and blog posts about MVC, Web API and other Asp.Net technologies, but it has been always a problem getting all these parts together in once place and utilize it to build something bigger.
In this post, I will start a series where we will introduce and build a complete functioning lin of business web application using Asp.Net MVC 5, I will start with introducing the business behind the application, and in each part, we will introduce a new feature of MVC and use it to build a new feature in our LOB application, this will allow us to know how to use MVC in practical example and we will also go deep dive in each feature to build more advanced features.
Introduction to the LOB Application
The application we are going to build together is called Appointment Manager, it will be a flexible application that allows users to register either as service provider or consumer, below are the list of features for each role
- Service providers. ex:doctors, mechanics, carpenters
- Check his Calendar
- View appointment details
- View ratings for his work
- Select which services he provides
- Manage his available time slots for each service
- Service consumers
- Browse service categories
- Browse service providers in a specific category
- View specific service provider details, history and rating
- Book an appointment
- Check his Calendar
- Rate a service Provider
- Admin
- Manage Service Categories
- Manage Attribute for each service category, ex: Mechanic category will have Car model, Year and his services will include Oil change, A/C, …
- Shared Features
- Register
- Login, Logout
- Edit Profile
By the end of this series we will have the application built and we will have full knowledge of MVC 5 framework
Introdction to the Technical Part
In each part, we will introduce a key component in MVC and use it to build another feature in the application, below are the features we are going to discuss in MVC
- Introduction to MVC
- Models
- View
- Controllers
- Routing
- Localization
- Bootstrap
- EntityFramework
- Identity and Security
- Bootstrap
- SignalR
Setting up ALM
Since this will be a real business application, we want to apply everything we do in the real life, and the first thing is to decide about how are we going to manage the application life-cycle management, fortunately, Microsoft offers a full platform for that;TFS, In our series, I will use Team services or TFS Online with GitHub as our source code repository, You can also use TFS on premise, Microsoft offers TFS express for free, you can download and install it and use it through the series
I will start by creating the project and then enter the list of features into a user stories.
Since TFS online support Git, I will use it as our source code control and I will link it later to GitHub
Create the project on TFS Online
In order to be able to use TFS online, you have to have a visual studio account, if you don’t already have one,go to VisualStudio.com and register using your MS Account, it is free
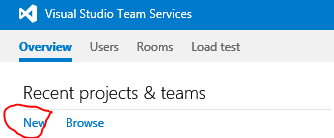
- Open your browser and navigate to https://[your account].visualstudio.com
- Under “Recent Projects & Teams” Click New
- Enter the Project name, description, Process Template and Version control as Git, TFS support different process templates such as Scrum and CMMI, if you have different needs, you can create a new template and customize it, we won’t go deeper here but you can read more about TFS templates from this link https://msdn.microsoft.com/en-us/library/ms243782.aspx

- Once the project is created, clink on “Navigate to the project” button
- Once the page is loaded, you will see a dashboard from where you can see everything about your project, ex: Code, Sprint burn down chart and user stories
- Click on Backlog link in the Work widget to start editing the user stories

- Once the page is loaded, you can add the story by typing the story title in title field and press enter or click Add button, if you can’t see the title field, just click the New link as shown in the screenshot below

After the story is added, you can double click it to open the edit dialog which will enable you to add all the details, once this is done, click the Save icon on the top right
- TFS offers you the ability to categorize your user stories into something called Features, think of it as sub-modules to group the related features together, You can click Features from the left menu and add the needed features, then go to the backlog by clicking the Stories link and Click the Mapping icon and make sure it is On, this will open a panel on the right with the list of features defined, drag the user stories from the left and drop it over the feature
So far, we talked about the application we want to build, we configured its source control and added its requirement.
In the next part we will introduce MVC 5, Create the project structure and build the home page for the application.
