Download Attachments in Single Page App and Asp.Net Core

Introduction

If you have a SPA built with any JavaScript framework and it has an attachment feature, you must hit the part where you need to allow the user to download an attachment and the App is authenticating users using Tokens.

The problem

With normal forms authentication based on cookies the browser will simply send the authentication cookie with each request to your web server without you doing anything. If you have a link that will allow the user to download a file from your server, the browse will automatically send the authentication cookie when the user clicks the link. This makes it so easy for you. But if you are using token based authentication, it is your responsibility to send a token for each request sent to the server via Ajax by using the Authorization header.

Unfortunately, you cannot control the headers sent to the server if the user is opening a link in a new browser window and the user will end up with unauthorized request.

The solution

Download the file using Ajax Request

In this solution, you have to request the endpoint that downloads the file using Ajax Request which will include the authorization header and then get all the file content in a variable and push the content to the user. This works fine if the file size is very small. But imagine the case when you are downloading a 500MB file. This is not going to work since the file is stored in a JavaScript variable before the download takes place.

Make the API that download the attachment anonymous

If the endpoint that downloads the file doesn’t require authentication then we are good. But now the file will be available for every one to download. So, we have to find a way to secure the file even when the endpoint is anonymous.

If you have some experience with Azure Storage, you may have heard of Azure Storage Shared Access Signature. The idea is simple. When the user requests a file, generate a token, save it to a temporary storage  and append it to the URL of the download file endpoint. When the user clicks the link, the endpoint will be called and the token will be validated against the temporary storage and if it matches then send the file contents. This way we will be sure that the link was generated by the application to that user. Still, if the link was shared to another user, he will be able to download the file. But this is another issue that we can worry about later.

Implementation

We will create a new asp.net core site with an endpoint to download files but I will not create a SPA in this article. That will be left for the reader. I will test the idea though using Postman.

Open Visual Studio, Create a new project of type “Asp.NET Core Web Application” then Choose “API” in the next dialog. You can still choose “Web Application (Model-View-Controller)”. I will leave authentication to the default “No Authentication”.

Right Click on the Controllers folder and choose “New Controller”, choose “API Controlller – Empty” and name it AttachmentsController. You should end up with the following

[Produces("application/json")]
[Route("api/Attachments")]
 //[Authorize]
public class AttachmentsController : Controller
{
}

Notice that I have commented the [Authorize] attribute since I didn’t setup authentication in this demo. In real life scenario, you will setup authentication and authorization using Token based Authentication.

Create a folder named Services and then create a new interface called ISecureUrlGenerator. The content should look like the following:

   public interface ISecureUrlGenerator
    {
        string GenerateSecureAttachmentUrl(string id, string url);
        bool ValidateUrl(string url, string id);
        bool ValidateToken(string id, string token);
    }

Now, add class to implement the previous interface

using Microsoft.Extensions.Caching.Memory;
using System;
using System.Collections.Generic;

namespace SecureAttachmentsDownload.Services
{
    public class SecureUrlGenerator : ISecureUrlGenerator
    {
        private readonly IMemoryCache memoryCache;

        public SecureUrlGenerator(IMemoryCache memoryCache)
        {
            this.memoryCache = memoryCache ?? throw new ArgumentNullException(nameof(memoryCache));
        }

        public string GenerateSecureAttachmentUrl(string id, string url)
        {
            var token = Guid.NewGuid().ToString().ToLower();
            StoreToken(id, token);
            var separator = url.Contains("?") ? "&" : "?";
            return $"{url}{separator}token={token}";
        }

        public bool ValidateToken(string id, string token)
        {
            var tokens = memoryCache.Get(id);
            if (tokens != null && tokens.Contains(token))
                return true;

            return false;
        }

        public bool ValidateUrl(string url, string id)
        {
            var uri = new Uri(url);
            var queryStringParams = uri.Query.Split("&");
            foreach (var param in queryStringParams)
            {
                var values = param.Split("=");
                if (values[0].ToLower() == "token")
                {
                    return ValidateToken(id, values[1]);
                }
            }

            return false;
        }

        private bool IsTokenValid(string id, string token)
        {
            var tokens = memoryCache.Get(id);
            if (tokens != null && tokens.Contains(token))
                return true;

            return false;
        }

        private void StoreToken(string id, string token)
        {
            var tokens = memoryCache.Get(id);
            if (tokens == null)
                tokens = new List();
            tokens.Add(token);

            memoryCache.Set(id, tokens);
        }
    }
}

In this implementation, I am storing the tokens in asp.net core memory cache. To enable this feature, you have to add the caching service in Starup.cs file

public void ConfigureServices(IServiceCollection services)
        {
            services.AddMemoryCache();
            services.AddMvc();
        }

You can replace the memory cache with a database if you want the tokens to be permanent and in this case you have to add an expiration date.

Before we utilize the secure URL genrator, we need a class to hold the attachments metadata since the user will request the list of attachments first and then download it.
Create a folder called Models and put the following class in it.

namespace SecureAttachmentsDownload.Models
{
    public class AttachmentMetadata
    {
        public int Id { get; set; }

        public string DownloadUrl { get; set; }

        public string Name { get; set; }

        public int FileSize { get; set; }
    }
}

Now, lets get to the part where we utilise our secure URL generator.
The flow will be as below:

  1. The user requests endpoint to return a list of attachments to be displayed to the user. Here, the DownloadUrl will have the token already. This will be secured by tokens
  2. The SPA will display this list to the user as links or buttons that the user can click to download the file. The href for the anchor tag will be the DownloadURl property
  3. The user will click the link to download the attachment
  4. The AttachmentController will be called and the endpoint will validate the token and return the file or else a 401

Open the AttachmentsController file and add the following 2 action methods

  using System.Collections.Generic;
using System.IO;
using System.Linq;
using Microsoft.AspNetCore.Authorization;
using Microsoft.AspNetCore.Hosting;
using Microsoft.AspNetCore.Mvc;
using SecureAttachmentsDownload.Models;
using SecureAttachmentsDownload.Services;

namespace SecureAttachmentsDownload.Controllers
{
    [Produces("application/json")]
    [Route("api/Attachments")]
    //[Authorize]
    public class AttachmentsController : Controller
    {
        private readonly ISecureUrlGenerator _secureUrlGenerator;
        private readonly IHostingEnvironment _hostingEnvironment;

        private readonly List Attachments = new List()
            {
                new AttachmentMetadata
                {
                    Id = 1,
                    Name = "bitcoin.pdf",
                    ContentType = "application/pdf",
                    FileSize = 1024
                },
                  new AttachmentMetadata
                {
                    Id = 2,
                    Name = "report 1.pdf",
                    FileSize = 3024
                },
                  new AttachmentMetadata
                {
                    Id = 3,
                    Name = "report 2.pdf",
                    FileSize = 2024
                }
            };

        public AttachmentsController(ISecureUrlGenerator secureUrlGenerator, IHostingEnvironment hostingEnvironment)
        {
            _secureUrlGenerator = secureUrlGenerator;
            _hostingEnvironment = hostingEnvironment;
        }

        [HttpGet]
        [Route("")]
        public IActionResult Get()
        {
            foreach (var attachment in Attachments)
            {
                var url = Url.Action(nameof(AttachmentsController.Get), "Attachments", new { attachment.Id }, Url.ActionContext.HttpContext.Request.Scheme);
                attachment.DownloadUrl = _secureUrlGenerator.GenerateSecureAttachmentUrl(attachment.Id.ToString(), url);
            }

            return Ok(Attachments);
        }

        [HttpGet]
        [Route("{id}")]
        [AllowAnonymous]
        public IActionResult Get(int id, string token)
        {
            if (!_secureUrlGenerator.ValidateToken(id.ToString(), token))
                return Forbid();

            var attachment = Attachments.FirstOrDefault(a => a.Id == id);
            if (attachment == null)
                return NotFound();

            var stream = new FileStream($"{_hostingEnvironment.WebRootPath}\\Files\\{attachment.Name}", FileMode.Open);

            return File(stream, attachment.ContentType);
        }
    }
}

Now run the application and open the URL /api/Attachments. You will get the following excepttion:

InvalidOperationException: Unable to resolve service for type ‘SecureAttachmentsDownload.Services.ISecureUrlGenerator’ while attempting to activate ‘SecureAttachmentsDownload.Controllers.AttachmentsController’.

To fix it, open the startup.cs file and add the following line to the ConfigureServices method

  public void ConfigureServices(IServiceCollection services)
        {
            services.AddMemoryCache();
            services.AddScoped ();
            services.AddMvc();
        }

Now open the URL api/attachments again and you should see the following JSON response

[
{
"id": 1,
"downloadUrl": "http://localhost:53098/api/Attachments/1?token=b78763c2-0109-4c12-b771-5f5cc5d19017",
"name": "bitcoin.pdf",
"fileSize": 1024,
"contentType": "application/pdf"
},
{
"id": 2,
"downloadUrl": "http://localhost:53098/api/Attachments/2?token=12497a4a-8f08-44ba-b9f6-914c4b484cc5",
"name": "report 1.pdf",
"fileSize": 3024,
"contentType": null
},
{
"id": 3,
"downloadUrl": "http://localhost:53098/api/Attachments/3?token=8647bb52-e47f-4580-8149-0b1d238ab0e2",
"name": "report 2.pdf",
"fileSize": 2024,
"contentType": null
}
]

As you can see, the downloadUrl property has the absolute URL for the file and the `token` query string parameter is appended. If you open the first link in a new browser window, the Action Get(id) will be called and the token will be bound to the parameter token.
In my implementation, I have put some files in a folder called Files under the wwwroot folder. But in actual projects, you may retrieve the files from a Database, FTP or any Document Management System.

If you want to make sure that it is really working, just try to change any character in the token query string and you should get a forbid response from the server. In this example you will get an exception: InvalidOperationException: No authenticationScheme was specified, and there was no DefaultForbidScheme found.
This is because I didn’t configure the authentication middleware.

You can find the source code for this article on GitHub.

This implementation has as flaw. The list of attachments are returned with the download URL and the tokens are saved in memory. If the user didn’t click the link but after sometime, the tokens may have been already expired. So, either you save the tokens in a DB or you before clicking the link, fire an Ajax request to an endpoint that gets the metadata for a single attachment. This way, the downloadUrl will be always fresh and working.

If you have any questions or suggestions, please leave a comment below.

Advertisement

Web API with windows authentication on asp.net Core 2

Most REST services that are being built using asp.net core now are using token based authentication either using asp.net core authentication middleware or third party products such as Identity Server. But, sometimes you only need to build your APIs for intrenal use within your organization who happens to be using Windows Authentication.

In this point, I will explain how to build a web API that utilizes AD for authentication and AD groups for authorization and how to integrate it with authorization policies.

Creating the project

Open Visual Studio 2017, Create new asp.net core Web Application and name it AspnetCoreWindowsAuth, then press Ok. Choose Web API as a project Template and Change the authentication method to Windows then press Ok to create the project.

If you select the project in the solution explorer and press F4, you will find nothing to set the authentication mode to Windows and enable/disable anonmous access just like you used to do in normal MVC web application. This is because it is moved to the launchsettings.json file under the properties folder. If you want to change it, you have to open the file and edit the value of the json property iisSettings which looks like below:

IIS Settings
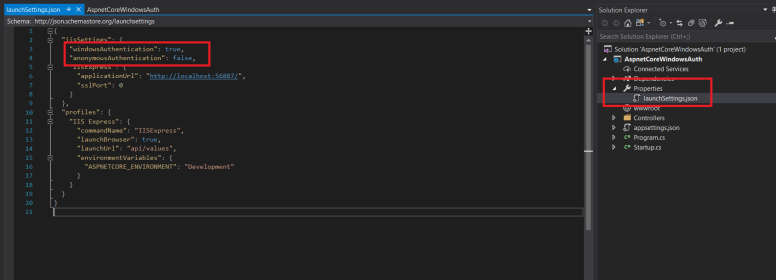
You can also modify the URL and SSL settings.

Now, if you run the project, it will run just fine and you can call the default Values controller and see the output and even windows authentication will be working as well and you can get the name of the logged in user using the User.Identity.Name property and it will return the Domain\\username although we didn’t add any authentication code yet in the pipeline

Add windows authentication middleware

Now, lets add the authentication middleware into the request processing pipeline. Add the line  app.UseAuthentication(); in the Configure method just before the  app.UseMvc(); . Remeber that the middlewares run in the same order they were added in the Configure method.

Add the following code in the ConfigureServices method before the services.AddMvc();

services.Configure(options =>
{
options.AutomaticAuthentication = true;
});

services.AddAuthentication(IISDefaults.AuthenticationScheme);

To make sure this is working fine, you can edit the Authorize attribute on the ValuesController and add the role name which should be an AD group name, ex: Employees

[Authorize(Roles ="Employees")]

Now you have asp.net core working fine with Active Directory and you can can authenticate the users according to the AD groups they belong to.

Using Authorization Policies

If you need more fine grained control over your controllers and you need to add more authorizastion logc, then you can go for authorization policies and it is really easy to configure as you can see below. Just add the following lines in the ConfigureServices method before the AddMvc statement

services.AddAuthorization(options =>
{
options.AddPolicy("OnlyEmployees", policy =>
{
policy.AddAuthenticationSchemes(IISDefaults.AuthenticationScheme);
policy.RequireRole(""S-1-5-4");
});
});

Here we defined a policy called OnlyEmployees and it requires the users to be windows authenticated and in the Role named Employees which is eventually mapped to AD group named employees. Notice that I didn’t write the name Employees in the RequireRole method. Instead, the value “S-15-4” was used, which is the SID for the AD Group named Employees. I found that this is how the group names are mapped to Roles in asp.net core and even if you tried to retrive the list of claims that the user have, it will translate to all SIDs of the groups that the user belongs to in AD.

To utilize this policy you have to annotate the controller or method with it as below

[Authorize(Policy = "OnlyEmployees")]
[Route("api/[controller]")]
public class ValuesController : Controller
{

}

By now you should have a working solution that depends on windows authentication and AD groups. Notice that this will only work with windows and most probably IIS.

You can find the code on GitHub if you want to use it or add to it.

https://github.com/haitham-shaddad/aspnetcore-windows-auth

Security Options for Asp.Net (Arabic)

This is a series of videos to explain the available options to secure your asp.net application. Although the demonstration is done using MS Stack, it applies to any technology.

In each video, we will take an authentication type, explain its concept and show a demo on an asp.net application. we should cover the following authentication types

  1. Basic
  2. Digest
  3. Windows
  4. Certificate
  5. Forms
  6. Claims
  7. OAuth


Here is the link to the YouTube playlist, I will add each video once it is recorded. Feel free to leave any comments or suggestions

Tips and tricks to enhance asp.net security

There are many ways to enhance Asp.Net Web Application security, either on the web, back-end or database level, in this post, I will list some useful tips and tricks that will help you make your web application more secure.

Although the article discusses the concerns in asp.net context, it is applicable to any other framework

Web Level

Connection String

There are 2 ways to configure the security for your database connection in connection string. The first one is  windows authentication, your application connect to the database server using the Application Pool Identity, and this is the recommended way as it doesn’t include writing any User Passwords in your connection string, not to mention the need to edit web.config with the new password if it has expired, which will cause a restart in the IIS application pool.

The second way is to connect through SQL authentication, in this case, you should not have the password added as a plain text, you must secure your connection string by encrypting it, .Net already support this by running the following command

aspnet_regiis -pe “connectionStrings” -app “/MyCustomApplication”

The aspnet_regiis exe can be found in your Microsoft.net folder under C:\Windows\Microsoft.net, you should find a folder with the version of your framework, ex: v2.0.*

the -pe parameter specifies which section of your web.config you want to encrypt and the -app parameter specifies which IIS web site you want to use.

The algorithm used to encrypt is RSA, for more information about how does this work, please refer to https://msdn.microsoft.com/en-us/library/dtkwfdky.aspx?f=255&MSPPError=-2147217396

Service Accounts Privillages

The service account is used to run the application pool which in turn run the web application, and it is the account that you web application uses as identity when it needs to connect to the database if you specified Integrated Security=True or if you need to have an access to file system, for ex: Logging.

This account must have the least privilege, on the file system, only give it a read access to a specific folder if this is all what you need, on the database, don’t just get lazy and give it db_owner, only grant it the permissions it needs, if it only needs read or write on certain tables, then let it be and don’t give it access to everything.

Why is that? because simply, if someone succeeded to get to this service account, they could harm your servers, I have seen many cases where people uses a domain admin as a service account, imaging what a hacker could do with such account.

Cross Site Scripting (XSS)

Imagine you have a web application, and there is the page with the URL: http://somesite/dashboard/pay?amount=1000.

This page is requested using GET and it needs the user to be authenticated, now the user can only access if he is logged in, but think of the following scenario:

You access a site named: http://someothersite, and in this site, there is an image with a src =http://somesite/dashboard/pay?amount=1000&toAccount=123-123-123.

What will happen is that your browser will automatically try to fetch the source of the image and make a get request to the URL, and by design, the browser will automatically send the cookies for somesite domain including the authentication cookie, and the result will be the execution of the URL and pay the amount of 1000 because the request seems legitimate.

To prevent this issue, you must implement something called Anti-Forgery tokens, this simply means that with each request, the site will put a hidden field in the page and store its value in the user session or cookie, and when the user posts the page to the server, the server will validate that the value in the hidden field is equal to the value stored in the session or cookie, then it will clear the value in the session, this way, if the user tried to submit the page again or in our example, another site request the URL on behalf of the user, the server will deny the request because the request will not include the correct value for the anti-forgery token.

MVC has an excellent support for this by calling the @Html.AntiForgeryToken() in the view and annotating the action method by [ValidateAntriForgery] attribute

to read more about it, follow these links Anti-Forgery in asp.net , Anti-Forgery in web API

SQL Injection

Although this is a very old issue and nearly most of the existing ORM solutions handle it, still some people fall into this problem, the danger of this issue, is that the hacker can get to your database, your database server and from there, he can get to all your other servers, so always validate the user input, always use parameterized queries and skip the user strings if you are building a dynamic SQL.

Web.Config Encryption

Same issue as the connection string, but applies also to keys stored in app.config, you can also call the same command and encrypt the appsettings section, you don’t need to worry about the decryption cause .Net makes it automatically for you

HTTPS

If your application has sensitive data and you want to prevent any chance of the network between the user and the web server being spoofed, then enable HTTPS, it works by encrypting the traffic between the browser and the server by a public/private key using certificate.

Cookies

If your site is using cookies for authentication or maintaining client state, then make sure no sensitive data is there, also if you don’t need to access the cookie inside your client browser, then mark the cookie as Http Only, if the cookie has httponly enabled then it will not be accessible through JavaScript and the document.cookie JavaScript object will not contain this cookie.

Another trick is to mark your cookie as secure only, this will make it accessible and the client will send it to the server only if HTTPS was enabled on the web site, this will ensure that your cookie is safe

Files under virtual directory

Don’t leave any backups in your virtual directory, sometimes we make a backup from web.config in the shape of web.bak or some other format, these files may be served to the client and a hacker can use the info inside it to hack your application.

Session Hijacking

If you are using session variables, which is mainly some variables stored on server session or a state server, depending on your configuration, the web server has to has a key for your session in order to be able to retrieve the data for your session, this key is called Session ID, and by default it is stored in a cookie named ASP.NET_SessionId, if someone gets to this cookie value, they will be able to log in to the site, use any cookie editor extension and update the session ID to your ID and from there they will be logged in as you, so if your site has an edit profile page or a page that allows the user to add credit card info, this data will be stolen.

To prevent session hijacking, you have to do the following:

  1. Use SSL, this way no one will be able to capture the traffic between your users and the web application, consequently, they won’t capture the session ID cookie value
  2. Make the session ID value harder to guess, the worst thing to do is to make the session ID as incremental value, if I logged in and found my session ID as 12345, then I can easily edit it to another number and it will be easy to obtain the session for another user
  3. Set the session ID cookie to be always Http Only, this will prevent any JavaScript from reading its value and will make it harder for any XSS
  4. Regenerate the session ID, this will make it harder for the attacker, even if he got the session ID, it won’t be valid for long time
  5. Prevent concurrent sessions, if you have your user logged in from one session, and he tried to login from another session, there is a probability that he is not the same person, you can be more certain by validating the IP and time used, ex: if the user IP is from USA, and at the same time the user is trying to connect from Europe, then most probably this is an attack

Eliminate unneeded headers

Some headers are not necessary in your web page response, such as Server, Asp-Net version and so on, these headers not only add a performance headache, but make the attacker job easier as he already knows what framework, servers and environment he will be attacking, so always edit your web.config or IIS Console and remove these unneeded headers

Database Level

Data Encryption

A very simple case for encrypting the data is the user passwords, never store it in plain text, you have to use a strong algorithm to encrypt the important data in your database, but note that this will affect the performance of the application because the web application will have to do some calculations to encrypt the data before persistence and decrypt it after retrieval, also you will not be able to write queries that include any of the encrypted columns.

SQL Server 2016 has a great feature called Dynamic Data Masking, it allows you to mask the data stored in a column in some predefined formats, ex: Credit Card, Social Security Number or an email address, permissions can be granted for some users and only those users will be able to see the data unmasked.

To read more about the topic, please follow this link

IPSec

This feature blocks all incoming connections to a specific server on all ports and allows you to allow certain IP and certain port, so in this case, the database server will not allow any connections but from the web servers for your application

IPsec Configuration

SQL Server Transparent Data Encryption (TDE)

In case all the above precautions failed to protect your database, at least you can protect the data on rest, TDE allows you to encrypt the database’s data file itself so that no one can open it on another computer without a secret key, to encrypt your database file, you need a master key, certificate protected by this master key, a database encryption key which is protected by the certificate and finally set the database to use encryption.

To read more about it, following this link https://msdn.microsoft.com/en-us/library/bb934049.aspx